
Imagine preparing a dish that effortlessly combines the savory richness of Italian sausage, ground beef, and creamy cheese, all wrapped in smoky bacon and seasoned to perfection. Shotgun Shells BBQ might be exactly what you’re looking for.
This recipe promises to impress and become a staple for family gatherings and game days. It’s simple to prepare, with straightforward steps and instructions. But what truly makes this dish stand out? Explore the essential ingredients and see how this tantalizing meal comes together.
Table of Contents
Key Takeaways
- Preparation involves stuffing manicotti shells with ground beef, Italian sausage, and cheese.
- Wrap each stuffed shell in bacon and season with BBQ seasoning before smoking.
- Smoke the shells at 250°F for 60-90 minutes, brushing with BBQ sauce halfway through.
- Ensure the internal temperature reaches 165°F for safe consumption.
- Store leftovers in the fridge for up to 4 days or freeze for up to 3 months.
Ingredients

To make BBQ Shotgun Shells, you’ll need manicotti shells, bacon, ground beef, Italian sausage, BBQ seasoning and sauce, and cheese like mozzarella or cheddar. These ingredients combine to create a flavorful and satisfying dish that’s sure to impress at any BBQ gathering.
Start with manicotti shells as your base. These pasta shells are sturdy enough to hold a hearty filling without falling apart. The filling itself is a delicious mixture of ground beef and Italian sausage. Combining these meats gives the dish a rich, savory taste that pairs perfectly with BBQ flavors.
Next, you’ll want to add cheese to the mixture. Mozzarella or cheddar works great, providing a creamy, melty texture that binds the filling together. BBQ seasoning is essential, infusing the meat and cheese mixture with smoky, spicy notes that are quintessential to any BBQ dish.
Once your filling is ready, you’ll wrap each stuffed shell in bacon. The bacon adds a layer of smoky flavor and crisps up during cooking, giving the BBQ Shotgun Shells a satisfying crunch.
Preparation Steps
Mix the Italian sausage, ground beef, and shredded cheese until well combined. This mixture will be the flavorful filling for your Smoked Shotgun Shells.
Next, carefully stuff the manicotti pasta tubes with the meat and cheese mixture. Make sure they’re filled to guarantee each bite is packed with flavor. Once stuffed, wrap each manicotti shell in a piece of bacon. The bacon adds a smoky, savory element to the recipe.
After wrapping the shells, season all sides generously with Meat Church Honey Hog BBQ seasoning. This step enhances the overall taste and ensures a well-rounded flavor profile.
After seasoning, place the stuffed and wrapped shells in the refrigerator for at least four hours. This resting period allows the flavors to meld and the pasta to soften slightly, improving the texture when cooked.
This preparation sets the stage for making delicious Smoked Shotgun Shells. You’re almost ready to move on to the next step, but first, make sure you have your favorite barbecue sauce on hand. It’ll be the perfect finishing touch for this tasty dish.
Smoking Process
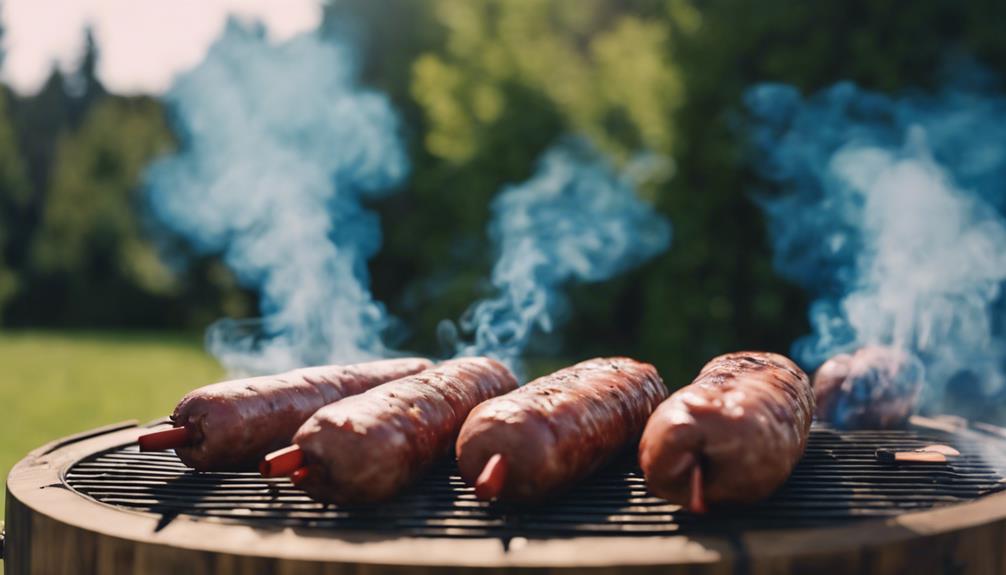
As your smoker reaches a steady 250°F, place the stuffed and wrapped shells onto the grates, spacing them evenly for consistent cooking. Using hickory or pecan wood pellets will give your smoked shotgun shells a rich, smoky flavor that complements the bacon and filling perfectly.
During the smoking process, allow the pasta tubes filled with delicious stuffing to cook for about 60-90 minutes. This time frame allows the bacon to become crispy and the flavors to meld together. Keep an eye on the internal temperature; aim for about 165°F to ensure everything is fully cooked.
About halfway through the smoking process, generously brush the BBQ sauce over the stuffed shells. This adds a tangy, sweet layer of flavor that enhances the smokiness of the hickory or pecan wood pellets. Reapply the BBQ sauce several times for a sticky, flavorful glaze.
Consistency is key. Ensure the shells are evenly spaced on the grates, enabling the smoke to circulate each one. By the end of the smoking process, your shotgun shells should have a gorgeous, smoky finish and a delectable taste that’ll make them the star of any BBQ gathering.
Recipe Tips
For the best results, let your filled shotgun shells rest in the fridge for at least 4 hours before smoking. This step is crucial to guarantee the shells soak up all the flavors and achieve the perfect tenderness. When preparing your BBQ shotgun shells recipe, follow these tips:
- Preheat Your Smoker: Set your smoker to 250°F. This temperature is ideal for infusing the shells with a rich, smoky flavor.
- Bacon Wrapping Technique: Use two slices of bacon per shell. This ensures full coverage, adds flavor, and prevents the shells from drying out.
- Glazing with BBQ Sauce: After smoking the shells for 1-1.5 hours, brush them with your favorite BBQ sauce and let them caramelize for an extra layer of deliciousness.
- Leftover Storage: Store any leftover smoked shotgun shells in the fridge or freezer. To reheat, use an air fryer or oven to maintain texture and flavor.
These tips will elevate your smoked appetizer, ensuring you get the most out of your manicotti shell filling. Remember, resting filled shells allow the ingredients to meld beautifully, while a preheated smoker and proper bacon wrapping technique will give you that sought-after smoky flavor.
Glazing with BBQ sauce and knowing the best methods for leftover storage and reheating smoked shells will keep your BBQ shotgun shells delicious.
Serving Suggestions

BBQ shotgun shells make a fantastic centerpiece for any meal, pairing perfectly with classic barbecue sides like macaroni salad, baked beans, and cornbread. Imagine serving these smoky, stuffed pasta shells at your next gathering; they’re bound to impress.
Use a quality barbecue rub to make the shotgun shells burst with flavor, and don’t forget the bacon-wrapped finish for that extra smoky goodness. Here are some serving suggestions to explore further your BBQ shotgun shells:
| Occasion | Accompaniments | Beverage Pairing |
|---|---|---|
| Family Gathering | Macaroni Salad, Baked Beans | Iced Tea, Lemonade |
| Game Day | Cornbread, Coleslaw | Craft Beer, Soda |
| Party Appetizer | Mixed Greens, Potato Wedges | Sparkling Water, Punch |
To make the shotgun shells even more versatile, consider experimenting with different fillings, such as cheese, ground beef, or pulled pork. They make a delicious appetizer or can be the main attraction at any event.
Cover them with foil for reheating instructions and bake at 350 degrees for 15 minutes until warmed through. Although we’ll explore further storage tips next, remember these easy suggestions to keep your smoked shotgun shells fresh. With these serving suggestions, your BBQ shotgun shells will be the star of any meal!
Storage and Reheating
To keep your BBQ shotgun shells fresh, store them in an airtight container in the fridge for up to 4 days or freeze them for up to 3 months.
Proper storage guarantees you retain these delicious treats’ delightful flavors and textures. When you’re ready to enjoy your leftovers, follow these reheating methods to bring them back to life.
- Refrigerator Storage: If you plan to eat the leftovers within a few days, keep them in the fridge.
- Freezing: For longer storage, place the shotgun shells in an airtight container and freeze them.
- Reheating in Oven: Cover the shells with foil and bake at 350°F for 15 minutes to ensure they’re heated through.
- Serving Suggestions: For a complete meal, pair reheated shells with side dishes like macaroni salad, baked beans, or cornbread.
Conclusion
You’ll love how easy and delicious Shotgun Shells BBQ is to make. With just a few simple steps, you’ll create a dish that will impress at any gathering.
The savory blend of meats, cheese, bacon, and BBQ seasoning, all smoked to perfection, offers a flavor experience that’s hard to beat. Serve these up, and watch your guests come back for seconds. Enjoy your new go-to recipe for any special occasion!